Avoid sticky disasters! Discover why overhydrated sourdough ruins your bread—and how proper hydration creates fluffy, easy-to-handle loaves every time.
Introduction: The Sticky Truth About Overhydrated Sourdough
If your sourdough bread turns into a gloopy, unmanageable mess every time you bake, you’re not alone. In fact, you’ve likely fallen into the most common—and most frustrating—trap in artisan bread making: overhydrated sourdough.
Millions of home bakers follow online recipes only to end up with dough that resembles soup rather than bread. Sticky, impossible to shape, and prone to collapsing in the oven, overhydrated sourdough isn’t just inconvenient—it sabotages your entire baking process from mixing to crumb structure.
But here’s the good news: you can fix it. And more importantly, you can prevent it forever by understanding one foundational principle: hydration balance.
In this comprehensive guide, we’ll expose the six devastating consequences of overhydrated sourdough, explain why your flour type matters more than you think, and reveal how lowering your hydration—even to 60%—can yield fluffier, easier-to-handle, and more reliable loaves than high-hydration “expert” recipes ever could.
Whether you’re a beginner or a seasoned baker who’s tired of sticky disasters, this is your roadmap to consistent, beautiful sourdough—without the headache.
What Is Overhydrated Sourdough? Understanding Baker’s Math
Before we dive into the problems, let’s define the core issue.
Overhydrated sourdough refers to a dough mixture that contains too much water relative to the flour, disrupting gluten formation, fermentation balance, and structural integrity.
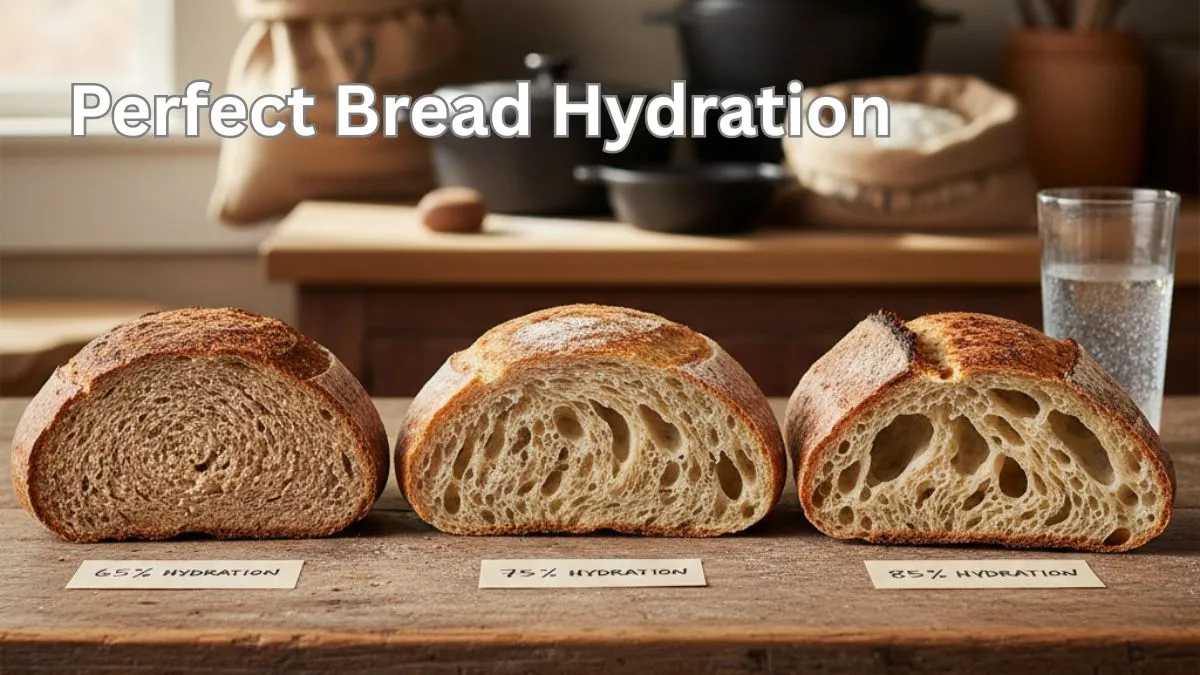
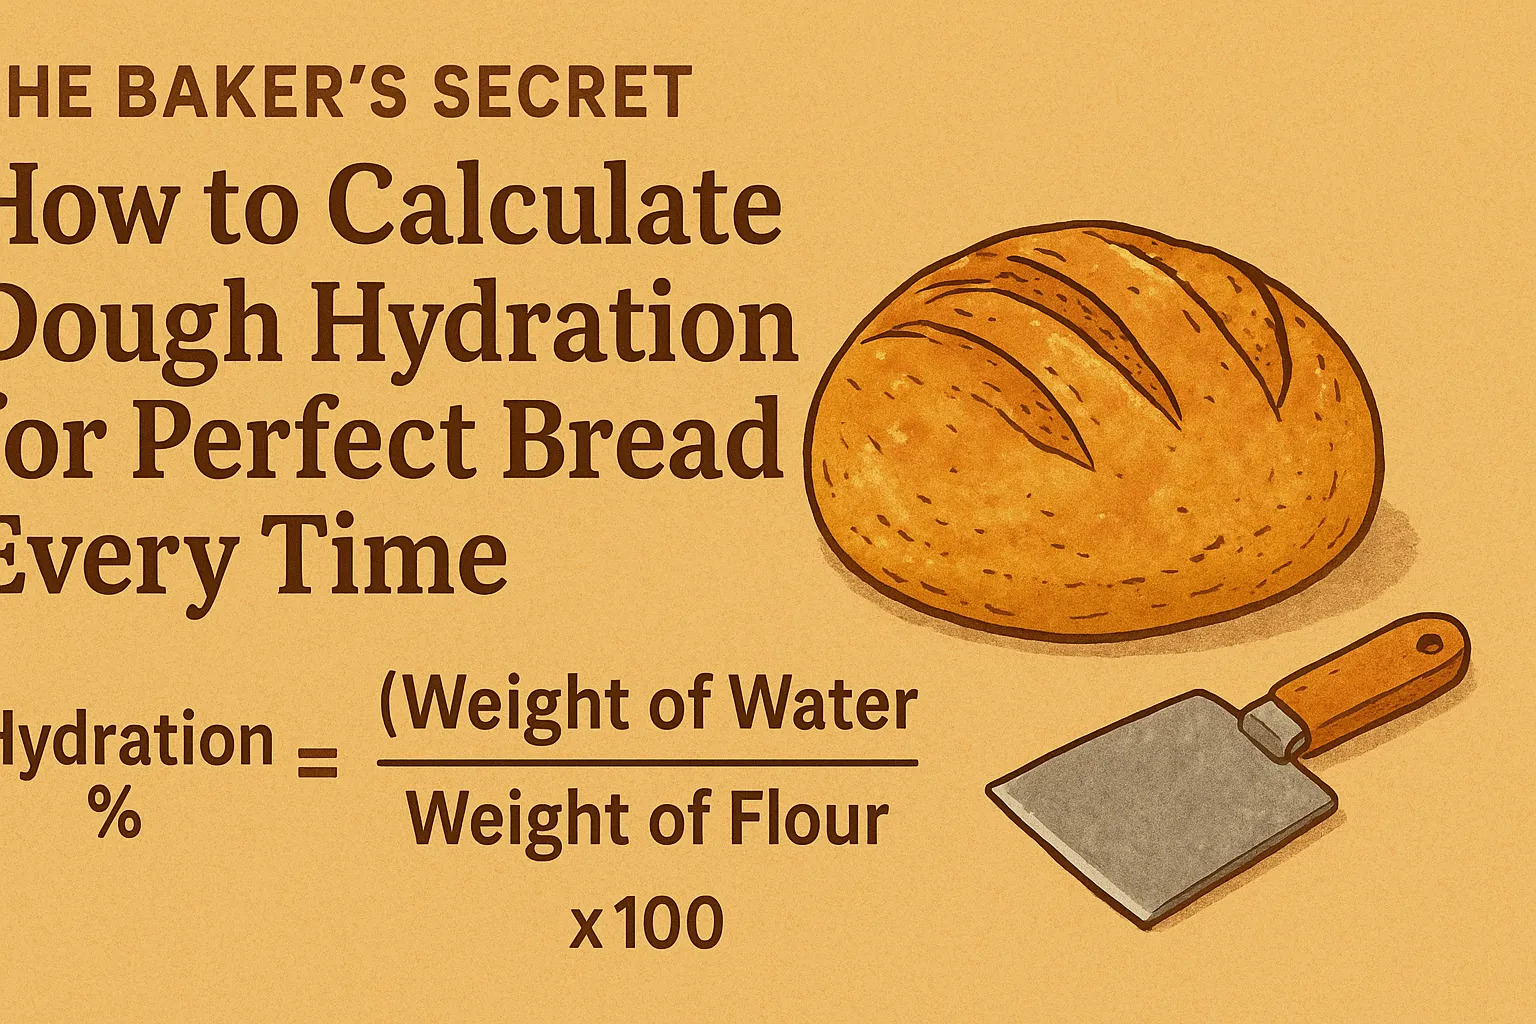
Bakers measure hydration using baker’s percentages, where flour is always 100%, and all other ingredients (water, salt, starter) are expressed as a percentage of the flour weight.
Example:
- 500g flour = 100%
- 400g water = 80% hydration → overhydrated sourdough
- 300g water = 60% hydration → ideal for beginners
While some artisan loaves use 75–80% hydration for an open crumb, most home bakers don’t need—or benefit from—such high water content. In fact, overhydrated sourdough at 80%+ hydration is a leading cause of failed bakes.
Why? Because not all flours absorb water equally.
Flour Type Dictates Hydration Needs
- Whole wheat or rye flour: High fiber and bran absorb more water → can handle higher hydration.
- All-purpose or cake flour: Low protein (8–10%) → absorbs less water → needs lower hydration.
- Bread flour (12–14% protein): Strong gluten network → can support moderate hydration (65–70%).
If a recipe says “use 400g water” without specifying the flour, it’s a recipe for disaster—especially if you’re using standard supermarket all-purpose flour.
This mismatch is why your overhydrated sourdough turns into soup while someone else’s looks perfect. It’s not your technique—it’s your hydration-to-flour ratio.
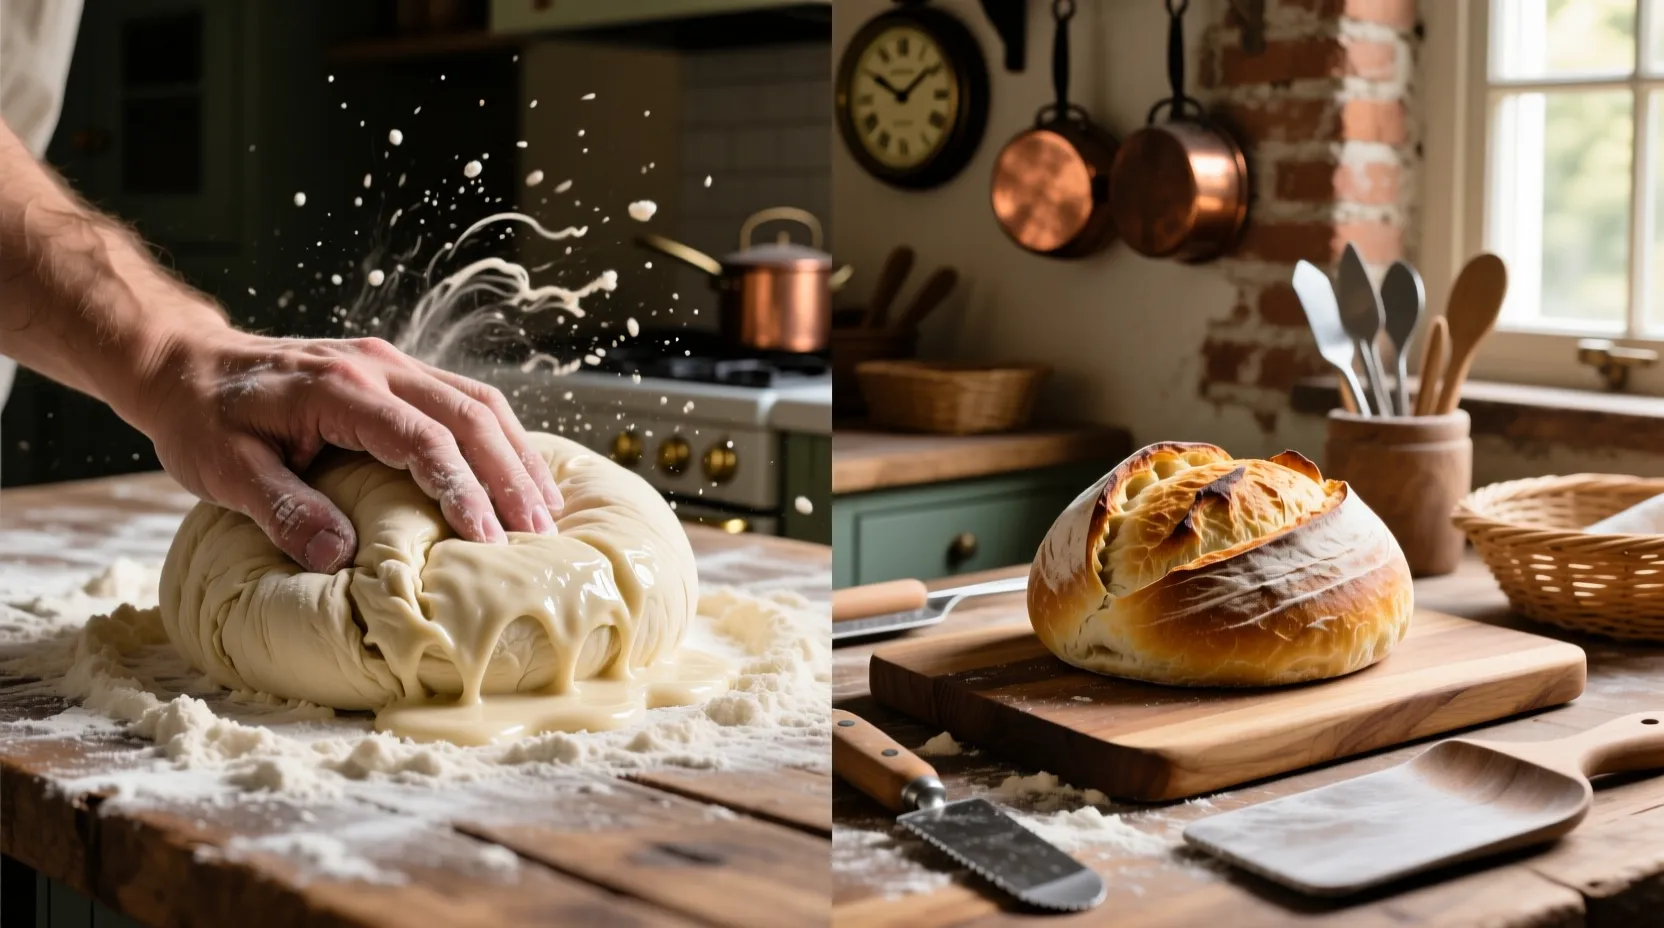
Consequence #1: Excessive Kneading Time & Gluten Development Struggles
One of the first signs you’re battling overhydrated sourdough? You can’t develop gluten—no matter how long you knead.
In a properly hydrated dough (e.g., 60% hydration with 500g flour + 300g water), gluten forms naturally during autolyse (resting after mixing). After 15–20 minutes, the dough becomes smooth, elastic, and easy to handle—with minimal kneading.
But with overhydrated sourdough (e.g., 500g flour + 400g water = 80% hydration), the excess water dilutes the gluten network. The result? A sticky, slack mass that refuses to hold shape.
You’ll spend 10–15 minutes extra trying to knead it into submission—only to end up with weak structure and inconsistent texture.
💡 Pro Tip: If your dough feels like pancake batter, add flour incrementally (10–20g at a time) until it becomes manageable. Yes, this throws off your original ratios—but saving the dough is better than wasting it.
Consequence #2: Fermentation Becomes a Full-Time Job
Overhydrated sourdough doesn’t just complicate mixing—it intensifies every stage of fermentation.
Because high-water dough lacks structural strength, it spreads and flattens rapidly during bulk fermentation. To counteract this, you must perform frequent stretch-and-folds—often every 20–30 minutes—to rebuild gluten and maintain shape.
Compare that to a 60% hydration dough, which may need zero stretch-and-folds if fermented slowly (e.g., overnight in the fridge).
Moreover, overhydrated sourdough is stickier, making each fold a messy, frustrating ordeal. You’ll need wet hands, a bench scraper, and patience—none of which are beginner-friendly.
The irony? You’re working harder for worse results. A stiffer dough ferments more predictably, rises evenly, and requires less intervention.
Consequence #3: Shaping Feels Like Wrestling Jell-O
Shaping is where many bakers give up—and overhydrated sourdough is the main culprit.
A well-hydrated (not overhydrated!) dough holds tension, springs back slightly, and seals cleanly. But overhydrated sourdough:
- Sticks aggressively to hands and surfaces
- Tears easily when folded
- Lacks surface tension, causing loaves to spread in the banneton
Even experienced bakers struggle with 80%+ hydration doughs. For beginners, it’s nearly impossible to achieve a tight, round boule.
🥖 Real-World Fix: Use lower hydration (55–65%) until you master shaping. You’ll build confidence faster—and your loaves will hold their form beautifully.
Consequence #4: Banneton Nightmare & Sticking Issues
Ever pulled your dough out of the banneton only to find half of it stuck to the liner? That’s overhydrated sourdough at work.
High-water doughs seep moisture during proofing, creating a glue-like layer that bonds to fabric or wood. Even with rice flour, sticking is common.
In contrast, a 60% hydration dough releases cleanly—often without any liner at all.
This isn’t just about aesthetics. Sticking damages the dough’s surface, ruins scoring, and causes uneven oven spring.
Consequence #5: Flat, Pancaked Loaves in the Oven
No matter how perfectly you shape it, overhydrated sourdough often collapses during baking.
Why? Because excess water weakens the gluten matrix. When the dough hits the hot oven, steam expands—but without strong gluten to contain it, the loaf spreads sideways instead of rising upward.
You end up with a dense, flat disc—not the tall, proud boule you envisioned.
While some bakers accept this for an “open crumb,” the truth is: you can achieve an airy interior with lower hydration by optimizing fermentation time and temperature.
🌡️ Key Insight: A 60% hydration Neapolitan pizza dough proves this—it’s incredibly fluffy despite modest water content, thanks to long, cold fermentation.
Consequence #6: Imbalanced Fermentation = Sour, Dense Crumb
This is the most overlooked—but critical—problem with overhydrated sourdough.
Water content directly affects microbial activity in your starter:
- High hydration → favors lactic acid bacteria → more sour, tangy flavor
- Low-to-moderate hydration → favors yeast activity → better gas production → fluffier crumb
In overhydrated sourdough, bacteria dominate, producing acid that breaks down gluten too quickly. The result? A dough that over-ferments easily, becoming weak, gummy, and dense—even if it looks puffy before baking.
Beginners often mistake this for “not enough proofing,” when in reality, their dough is over-fermented due to excessive water.
By using 60–65% hydration, you slow bacterial activity, extend your fermentation window, and give yeast time to create a light, resilient crumb—especially crucial when using low-protein flours.
How to Fix Overhydrated Sourdough (Even Mid-Process!)
Don’t toss your dough! Here’s how to rescue overhydrated sourdough:
1. Add Flour Gradually
- Sprinkle 10–20g flour at a time while mixing.
- Stop when the dough clears the bowl and holds shape.
- Accept that salt/starter ratios will shift slightly—better than waste.
2. Use the Bassinage Technique (Advanced)
- Start with a stiffer dough (55% hydration).
- After gluten develops, slowly add reserved water in stages.
- This builds a strong network that can absorb extra moisture.
⚠️ Warning: Bassinage is expert-level. For 95% of home bakers, starting with lower hydration is smarter.
3. Convert to Bread Rolls
- If your loaf is too wet to shape, divide into rolls.
- Coat in seeds or oats—they mask stickiness and add crunch.
- Bake on parchment for easy release.
The Sweet Spot: Why 60% Hydration Changes Everything
Forget chasing 80% hydration. For most home bakers, 60% is the magic number.
- 500g flour + 300g water = 60% hydration
- Easy to mix, knead, shape, and bake
- Forgiving fermentation window
- Fluffy crumb without excessive stickiness
And yes—you can still get an open, airy crumb at 60% hydration by:
- Using long, cold fermentation (12–18 hours in fridge)
- Ensuring proper gluten development (autolyse + gentle folds)
- Scoring deeply for controlled oven spring
The proof? Beautiful, puffy loaves that release cleanly from bannetons, rise tall in the oven, and slice with a tender, hole-filled interior.
Final Thoughts: Ditch the Soup, Embrace the Dough
Overhydrated sourdough isn’t a badge of honor—it’s a barrier to consistent success. By lowering your hydration to 60–65%, you eliminate sticky messes, reduce hands-on time, prevent over-fermentation, and gain control over your bake.
Remember: Great bread isn’t about extreme hydration—it’s about balance. Flour, water, time, and temperature must work in harmony. And for most of us, that harmony starts with less water, not more.
So next time a recipe calls for 400g water per 500g flour, pause. Ask: What flour are they using? Is this realistic for my kitchen?
Chances are, you’ll be far better off with 300g water—and a dough that actually behaves.
Your future self (and your countertops) will thank you.
Frequently Asked Questions
Can I still get an open crumb with low hydration?
Absolutely! Fermentation time and temperature matter more than hydration alone. A 60% dough with 16-hour cold proof often outperforms a rushed 80% dough.
How do I calculate hydration if I use multiple flours?
Add all flour weights together (e.g., 400g bread + 100g whole wheat = 500g total). Water is % of that total.
My dough is sticky even at 60%—what’s wrong?
Your flour may be low-protein. Try bread flour, or reduce water by 10–20g next time.
Should I always avoid high hydration?
Not always—but master 60–65% first. Once you understand dough strength and fermentation, experiment cautiously.
Conclusion: Master Your Dough, Not the Mess
Overhydrated sourdough is the silent killer of beginner bakers. It promises artisan results but delivers frustration, wasted ingredients, and flat loaves.
By embracing moderate hydration (60%), you unlock a world of reliable, joyful baking—where dough is smooth, shaping is satisfying, and every loaf rises with pride.
Stop fighting soup. Start building bread.
And remember: the best sourdough isn’t the wettest—it’s the wisest.